


Sand Cone Test for In-Place Density
Written by Keil Krieg
July 25, 2023
In addition to nuclear density testing, geotechnical technicians also use sand cone testing to determining in-place density.
Why perform sand cone tests?
Sand cone tests help geotechnical engineers determine in-place density in areas where nuclear density testing isn’t ideal. They can also use the sand cone method to ensure that nuclear density test results are accurate.
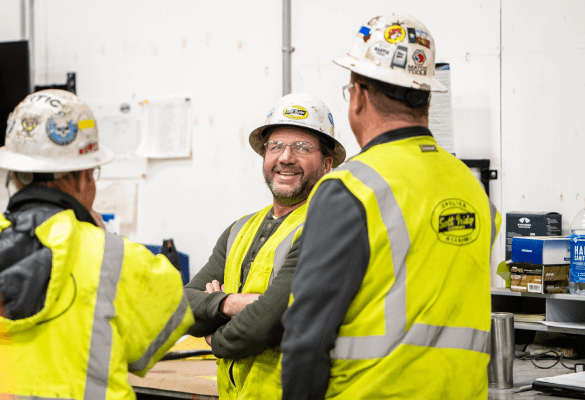
“We'll correlate with our gauges and determine if our gauges are reading accurately,” explains Keil Krieg, CMET Department Manager at SAECO.
How it works
Geotech engineers perform sand cone tests by removing some in-place soil and filling the hole with a known-density sand. That gives them a volume they can use to mathematically determine the in-place density.
Step 1: Choose a testing spot
Keil digs a hole for a sand cone test that's approximately six inches deep. That’s pretty small, so it’s important to choose the right spot for the test. Engineers must observe the jobsite and choose a spot with soil that’s representative of the entire area.
Avoid any anomalous soil areas, because testing there will lead to inaccurate results. “You want to try and get an accurate representation of what's out there,” Keil says.
Step 2: Prepare the testing site
It's important to prepare a good, flat surface area for this test. That keeps the testing plate from rocking.
You also want to make sure there's no equipment moving around you. Vibrations can cause extra sand to shake out of the cone, leading to inaccurate test results.
Step 3: Dig the hole
Keil demonstrates how to carefully excavate the hole so the sidewalls are as near to vertical as possible.
If any large rocks protrude into the hole, the engineer will have to move to another location and try again. Why, you ask?
Keil answers, “It's very important that do not lose any soil during this operation any lost soil is going to be mathematically determined as a lower density and a lower compaction . . . it's going to be the detriment of the contractor.”
If the contractor compacts the soil to those faulty specifications, it won’t be compacted enough. That means it won’t support the structure they’re trying to build, so they’ll have to go back and rework the soil to get it right.
To get it right, sand cone testing is time-consuming—but it's also considered more accurate than nuclear density tests. That’s why engineers use sand cone tests to determine how accurate a nuclear density gauge is.
Tips for getting accurate sand cone test results
Keil recommends keeping a bucket over the surface of this test to retain any material that falls while you’re transferring it.
Another consideration is moisture content. During this test, the soil is drying out—so Keil uses a lid to capture that moisture.
Finally, most soil contains rocks that can throw off the test. The larger the rocks, the less likely you are to have good soil representation. The solution? Dig a larger hole. That’s why—while sand cone test holes are typically about six inches deep—the test also calls for a minimum required volume to compensate for larger rock particles.
Step 4: Clean out the hole
Completely cleaning the hole out is crucial. Any soil that’s left in the hole prevents sand from filling that area—and since the soil has an unknown volume, it’ll throw off the calculations.
To keep that from happening, Keil removes the smaller particles from the bottom and brushes all the loose particles out, even the side walls. He also cleans the lip on the testing equipment to ensure good contact with the sand cone.
Step 5: Insert the sand
Next, Keil overturns the pre-weighed cone and jug, letting the sand fill both the hole and the cone.
During this step, he matches a pre-calibrated mark on the plate to a mark on the cone. He uses this mark because he already knows the volume of sand that fits in the cone, and he’ll subtract that number from the total volume of sand that goes into both the cone and the hole. That tells him the volume of sand that fits into the hole.
Step 6: Weigh and prep your soil sample
While the sand is running into the hole, Keil weighs the soil he removed from the hole. His sample here weighs 9.22 pounds, but he still has to subtract the weight of the bucket it’s in so he’s only weighing the soil.
Next, he determines the soil’s rock content by sifting it over a #4 screen, being careful not spill anything since that could skew the results. The soil will fall through, and the rocks will stay on top.
Keil weighs the rock, then uses the weight of both the rock and soil to determine what percent rock the soil contains. Then, he corrects his maximum dry density calculations with that number. Keil’s sample is 15% rock.
This step is important because some tests that help determine maximum dry density require the soil sample to be free of rocks. But since rock exists in the field and not in the maximum dry density tests, engineers mathematically calculate that rock back into their numbers later.
Step 7: Calculate the soil's maximum dry density
Once the sand cone is done running, Keil weighs the sand.
He determines the difference between the weight of the cone and the jug when they were full and after the test ran. Then, he subtracts the “after” weight from the full weight to find the total weight of sand in the hole and in the cone.
From there, he uses the weight and volume from the sand in the hole—as well as the weight of the soil they removed from the hole—to find the soil’s volume.
The soil’s volume determines its maximum dry density and the percent compaction contractors need to achieve in order to build on it.